Disney World Planning Guide for the Organized-but-Easily-Overwhelmed Beginner
by Brooke Forry

If you’ve followed along for a while, you know that I’m a Type A planner who is also prone to anxiety and overwhelm. Planning ahead for situations — whether it’s my day, week, or a future vacation — helps to keep my anxiety at bay.
But what happens when a Type A, easily overwhelmed planner stares down the most intimidating trip of all trips? Yes, I’m talking about…
Disney World with kids.

Cue tears, tantrums, and screams. (From me, not my kids.)
Okay, I’m being dramatic. I didn’t really throw tantrums, but in the year-long process from choosing our dates and booking our hotel to actually boarding a plane to Orlando, FL, there were times I felt incredibly overwhelmed. Walt Disney World travel requires basically learning a whole new language to conquer the My Disney Experience App, navigate to and through the parks, and make the most of your time there.
The good news: it was worth it, we felt adequately prepared, and we had an amazingly fun time!
I’ll leave the accommodation and travel recommendations to the much more experienced travel agents with whom you should most definitely work (it’s free!) There are many, many options to choose from, and your travel agent will guide you based on your budget, your preferences, and availability. We worked with my friend Sue Johnson from Pixie and Pan Vacations, and Sue was immeasurably helpful in the planning process. She narrowed down the hotel options for us and really made that element of planning our trip a painless process.
Even with a travel agent’s advice and hand-holding, quite a bit of time was still required from me to consider Sue’s recommendations, prepare, learn the lingo, and research what we actually wanted to do while we were there.
It is very easy to get lost in and overwhelmed by ALL the Disney World details. Below are the top tips, tricks, and terms I, personally, picked up that I think would help any Disney World newbie get off to a great start.
The notes below are not exhaustive (I don’t even know if a single blog post about Disney ever could be!), and it’s certainly not brief, either, but my goal was to create something that could serve as a single Disney World reference for beginners if you want to avoid too much of a deep dive and Googling (or if you simply don’t have time to seek out information in multiple places).
Please remember: I am not an expert! I am a just a fellow former beginner who collected a lot of information that I’d like to share.
You probably won’t be able to digest this all at once ;) But you can come back to this post as you continue to plan. I’ve included links to more details, where applicable, so you can further explore what is most relevant to your trip if you’d like. For follow-up questions once you’ve learned some basics, again: I highly recommend working with a travel agent.

Walt Disney World Parks
There are four parks in Walt Disney World, all including rides, shows, restaurants, characters, and plenty of fun:
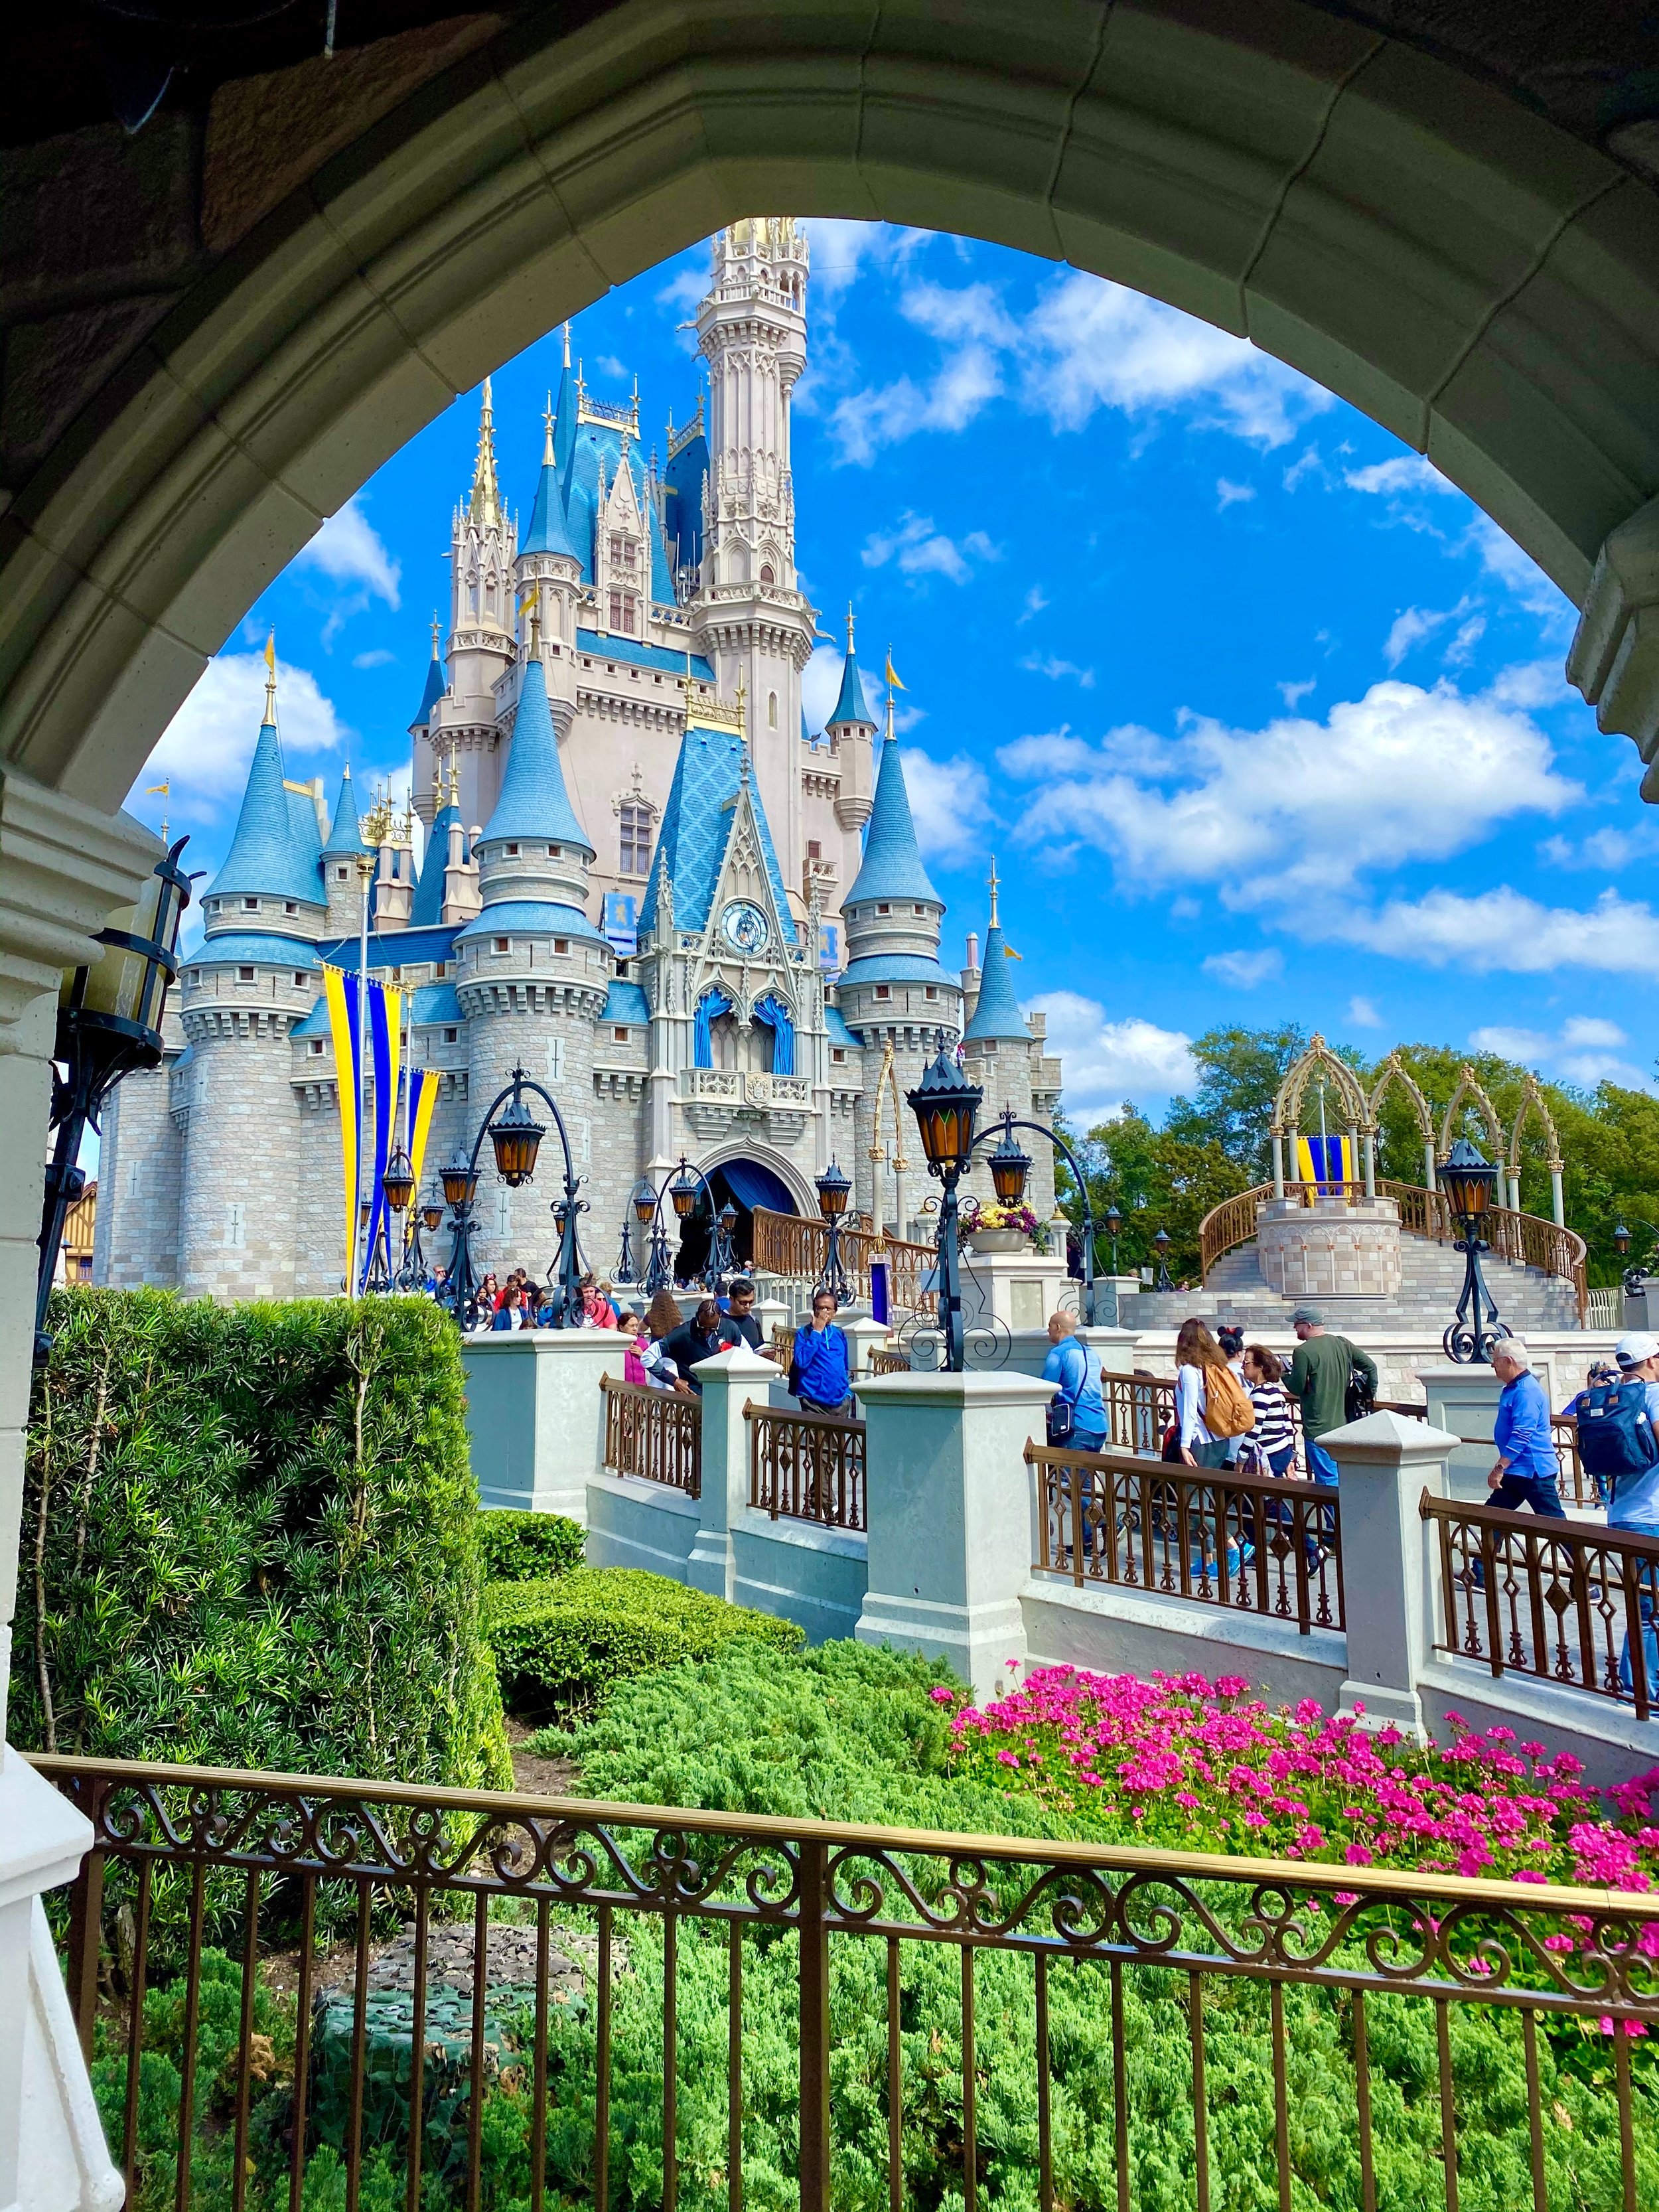
Magic Kingdom - The OG that is the spot to catch the bulk of the old school, classic rides and attractions, plus lots of parades, great fireworks, and plenty of more current characters/themes, as well.
Epcot - Explore the world within Epcot, with new dining and cultural explorations literally around each corner. There are rides and incredible evening fireworks, too!
Animal Kingdom - Immersed in natured, you can see animals on a safari, ride a raft through river rapids, and, of course, eat to your heart’s content.
Hollywood Studios - Our favorite park of all, Hollywood Studios includes Toy Story Land, Star Wars: Galaxy’s Edge, a Frozen sing-along, and even the beloved Muppets.
You can explore, sort, and filter the rides/attractions at all the different parks, as well as things to see and do at places like Disney Springs, right here.

Terms to learn

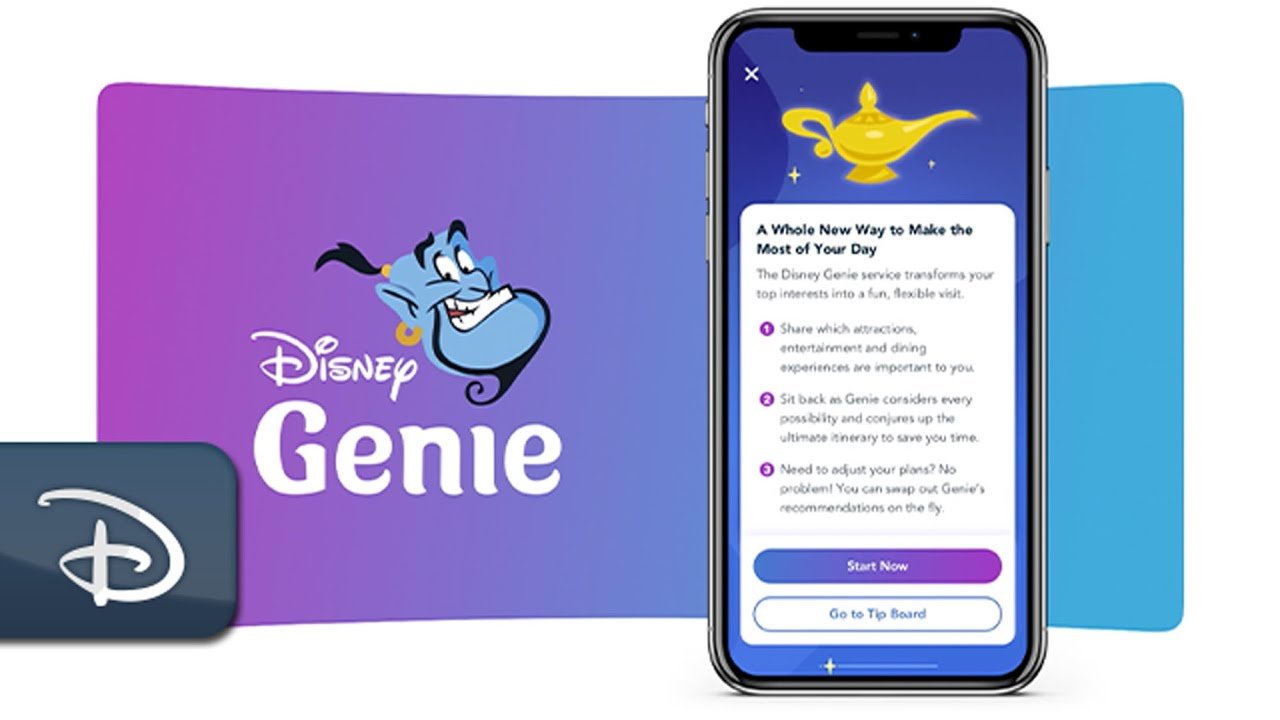
My Disney Experience - The app, also known as MDE, where all of your Disney plans will live, and also the app you’ll use once you are in the parks to see the Disney Genie’s suggestions of what to do next (under the “My Tip Board” tab); schedule Lightning Lanes after purchasing Genie+; schedule/purchase Instant Lightning Lanes for the most sought after rides; see your full day’s agenda (in the “My Day” tab); order Quick Service meals; etc. (See below for a breakdown of all these terms!)
Disney Genie - A complimentary service, accessed through the My Disney Experience app, that shows tips for your day based on the park you have scheduled for any given day. The main feature is “My Tip Board,” where you’ll see customized suggestions for what rides to do based on up-to-date wait times, upcoming LLs that are available for rides you have marked as favorites, and Quick Service dining options nearby. See the current Lightning Lane options here for: Magic Kingdom; Epcot; Hollywood Studios; and Animal Kingdom.
Lightning Lane - Quick access lines to rides that typically have longer standby waits. Rather than simply walking up to a ride and waiting in the line with everyone else, a Lightning Lane (or LL for short) is basically VIP access that will mean a shorter wait. LLs are available exclusively through the Genie+ service (see below). When you book an LL, you book it for a one hour window when you need to check in for the ride, so you have some flexibility.
Genie+ - This is the new pay-to-play service to gain access to Lightning Lanes (LL). Genie+ replaces what used to be called Fast Pass, and now costs $15 per day, per person, for access. You can either add Genie+ to your full trip ahead of time, OR purchase it for each individual day, if desired, through the My Disney Experience (MDE) app. If the latter, you cannot purchase until after midnight on the day you plan to use it. Beginning at 7am on any given day, you can then begin scheduling LLs for that day’s scheduled park. You can schedule one LL at a time, and you can schedule subsequent LLs either after you’ve checked in to your first LL, or two hours after park opening — whichever comes first. If you have a Park Hopper ticket (see below for a Park Hopper description), you can also schedule LLs for any other park after 2pm. See below for even more tips!
Individual Lightning Lane - Certain rides are not available for regular Lightning Lane (LL) reservations through Genie+. The most highly sought after rides — such as Rise of the Resistance (ROR), a Star Wars ride at Hollywood Studios, and Remy’s Ratatouille Adventure at Epcot — have separate pay-to-play Individual Lightning Lane (ILL) fees, ranging from $7 to $15 per person, per ride to gain VIP access and a shorter wait. You can purchase up to two ILLs per day. Remember, ILL rides are separate from and in addition to Genie+ Lightning Lanes. You do not need Genie+ to purchase an ILL, but you can certainly purchase both if you wish. Just like regular LLs, you book an ILL for a one hour window when you need to check in for the ride, so you have some flexibility.

Standby Line - If you’re not planning to purchases Genie+ for regular Lightning Lane (LL) access, you miss out on the available LL passes on any given day (many are booked up for the day by early afternoon), or don’t purchase Individual Lightning Lanes (ILL) for super popular rides, you will be waiting in regular old standby lines with the common folk ;) Sometimes wait time predictions are off and standby lines aren’t so bad… just be prepared with some snacks and entertainment to help the time pass, especially if you are waiting with little kids.
Park Hopper - An add-on that allows you to visit more than one Disney park per day. The price varies based on the age of the guests, how many days your group is visiting the parks, etc. With the Park Hopper (PH) option, you still need a park reservation that indicates where you will begin your day, and then after 2:00pm* you can visit any of the three other parks. (We started one day at Magic Kingdom, Park Hopped to Hollywood Studios for a few rides in the afternoon, and then Park Hopped to Epcot for their incredible fireworks!) If you want to add the Park Hopper option, you cannot pick and choose what days you add it — you either add it to your whole trip, or you forego it. ( * This time may vary, so check the Park Hours calendar for your trip dates to be sure.)
Budget/Moderate/Deluxe resort - There are more than 25 hotel/resort options on-site at Disney World and they vary in price and amenities. The terms Budget, Moderate, and Deluxe signify the overall price range. A Disney travel agent can help you narrow down the best options based on your budget, your preferences, and your travel dates.
On-site vs. Off-site - Staying in one of the aforementioned 25+ Disney World resorts means you are staying on-site. You may be able to save a lot of money by staying at an off-site hotel or rental home in the Orlando area, but keep in mind that it will mean needing to coordinate daily transportation to the parks (likely via rental car), you will not have the ability to “Rope Drop” or gain early entrance to the parks, you will not be able to book Genie+ Lightning Lanes (LL) until each park opens each day, etc. If you are on a tight budget, plan to travel with a large group where a rental home makes more sense, or travel to Disney often and don’t mind losing some of the on-side benefits, staying off-site is a great way to save money!
Magic Bands - Optional (but convenient) wristbands that act as on-site Disney Resort room keys, give you quick access to parks and previously scheduled Lightning Lanes (LLs), and allow you to charge food and merch purchases to your Disney Resort room. While these now cost $10+ a pop (they used to be complimentary), we really enjoyed the convenience and ability to have less dependence on our phones every time we were entering a park or getting into an LL. Plus, our kids felt SO FANCY being able to flash their Magic Bands each time we entered a new park or LL, and using it to enter our hotel room if we were a few steps behind. (However, my husband and I have been unsuccessful trying to use our Magic Bands at Trader Joe’s since we returned from our trip. How rude.)

Rope Drop - Lingo for getting to a park prior to its official opening to literally be among the first to enter when Cast Members drop the rope that is closing off the park. This means you can also be first in line for some of the more popular rides without needing Genie+/ILL. Rope drop times vary per park, and is honestly one of the things I researched the least because I knew there was no way we were going to be up and at ’em early enough to rope drop. For some people, rope dropping means being on a bus to Magic Kingdom by 7am, which was when I was just dragging myself out of bed to schedule LLs while my family slept. We preferred to maximize our evenings than attempt any early mornings!
Cast Members - All of the people who work at Disney World are considered Cast Members. If someone directs you to a Cast Member, don’t be confused!
Dining Plan - There are currently no dining plans at Walt Disney World as of March 2022, but you can check here to see if they will be available for your trip.
Dining Reservation - Obviously everyone knows what a dining reservation is, but what you might not know is that you need to book these far in advance at Disney World. You will be able to book sit-down dining reservations 60 days prior to the start of your trip, and reservations for the popular places go fast. Our travel agent, Sue, notified us when we were able to make reservations and even booked our top choices for us. If fine dining is really important to you, you will want to do more research here and have a game plan in advance of the 60-day mark! Also keep in mind that any dining reservations you decide not to keep need to be canceled 24+ hours before the reservation or you risk being charged. (Or, find a blue Guest Services umbrella in any of the parks and they will cancel it for you, and in most instances you won’t be charged a fee even if you’re within the 24-hour window.)
Quick Service - if you’re looking for something to eat while you’re in a Disney park, there are lots of Quick Service (QS) options — meaning cafeteria- and/or counter-style eateries. The best way to order food via a QS dining option is, hands-down, through the My Disney Experience (MDE) app. You can pre-order, choose a window of time for when you’d like to pick up your meal, and tell the app when you’re at (or near) the QS location within that window so they will begin preparing your order. You will then receive a notification, often within 10 minutes, when your food is ready and at what counter to pick it up. There are some menus that are better than others, and often it’s hard to find anything healthy, so I recommend having an overview of the QS options you’re interested in at each park so you’re prepared to place an order before everyone gets hangry.
Memory Maker - for $169 (if purchased in advance) you can add the Memory Maker photo package to your trip. There are photographers stationed all throughout the parks who will take your photo anytime you stop and ask. I just flashed my Magic Band, the photographer scanned it, took photos of my family, and often within minutes the photos would be visible in the My Disney Experience (MDE) app. Certain rides, such as Splash Mountain, Haunted Mansion, and Frozen Ever After also have automatic cameras that go off while you’re riding, and those (often hilarious) photos will also appear in your account.
Genie and Genie+ tipS
for scheduling Lightning Lanes (LL) and Individual Lightning Lanes (ILL)
I highly recommend watching this video to learn the ins and outs of the free Genie feature and Genie+ add-on feature (for access to Lightning Lanes) in the My Disney Experience App:
I didn’t truly grasp the capabilities until I watched this video and had the app in front of me while I watched. I did this the night before our first park day, and, along with the steps below and tips I collected prior to our trip, it helped me successfully navigate the app and book the rides we wanted. Full disclosure: I only watched the first half (and the Fancy Rides™ that she mentions are now just called Individual Lightning Lanes), and that was enough to get me on track!
Please note: Guests staying off-site cannot access Individual Lightning Lanes (ILLs) until park opening, while on-site guests can access ILLs at 7am.
Once you have an understanding of the app and features, you are sure that you have purchased Genie+ for your day, and it’s getting close to 7am, here are the steps I recommend:
Before 6:55 am:
Go to your Tip Board and edit the selections in the app for the rides and attractions you’d like to secure with Lightning Lanes (LL) and Individual Lightning Lanes (ILL) in the park(s) you plan to visit that day. Keep this as minimal as possible for now, as you want your favorites to be right at the top for when you want to snag your LL and ILLs at 7:00am.
Get your (charged) devices ready! If there is more than one person in your group with a smart phone or iPad, use it.
Turn off WiFi on your device(s) if you’re staying at a Disney resort. This way, at 7am, when everyone else at the resort is also trying to book rides, you won’t experience any internet slowness.
Make sure you are logged in to your MDE account on any devices you’re using so you don’t waste time logging in. (Log out and log back in around 6:50am to be sure.)
If you plan to purchase an ILL for a ride like Remy’s Ratatouille Adventure, Rise of the Resistance, etc., be sure that your payment method is already linked to your account so you don’t have to enter your payment information (and risk losing your ILL reservation).
Go somewhere distraction-free if your kids are already awake and bouncing off the walls. For me, this was the bathroom!
If more than one person will be scheduling rides, decide who is in charge of what.
Example: On our Hollywood Studios day, getting on Rise of the Resistance (ROR) was our #1 priority, and our #2 priority was booking Toy Story Mania. The “My Tip Board” refreshed more quickly on my husband’s phone, so he jumped on purchasing the Individual Lightning Lanes (ILL) for ROR, and I was then in charge of booking Lightning Lanes for Toy Story Mania.Go to time.gov on a device you aren’t using to schedule LLs and ILLs — for us, it was our iPad. Time.gov has the official time, which varies a few seconds from the clocks on iOS devices, so you can be ready to refresh at exactly 7am. (Yes, this sounds ridiculous, but it matters for some of the more popular rides.)
At exactly 7:00am:
Refresh “My Tip Board” by pulling down from the top of your screen.
Once it’s updated, quickly tap on the Lightning Lane time for the rides/attractions you’d like to reserve. (You don’t get to pick and choose your time, so you do sort of have to go with the flow and choose whatever is available).
If it’s an ILL-only ride, be ready to purchase for all the members of your group (with your previously stored/linked payment method). Note: you can purchase/book no more than two ILLs a day.
If you have multiple devices/people on the app, one of you can choose your first regular LL of the day while the other secures the ILL.
If things aren’t loading or appear to be fully booked/sold out when they do load, don’t despair! Keep refreshing the app, as many people report being able to book ILLs and LLs after 7:15.

Additional notes:
After you’ve booked your first LL and ILLs for the day, you’ll see them in the “My Day” tab, alongside some recommended attractions.
After you’ve booked your morning LLs and ILLs, you can also now edit your Top Picks by clicking “edit selections” at the top of your Tip Board, so you can see wait times and LL availability for other rides and attractions you hope to check out at your chosen park(s).
Once you check in to your first LL, you can select your next LL for the day through the app… OR…
If your first LL isn’t scheduled until later in the day, you can select your second LL two hours after your scheduled park opens for the day.
You can continue to book your next LL after you’ve checked in to a current LL throughout the day, based on availability. By mid-afternoon, most LLs are booked through the day and no longer available.
If you have a Park Hopper ticket, you can also book LLs and ILLs at any other park on the day you have Genie+. Despite what available LL time shows up in the app for the other parks, you will automatically be prompted to select LL times available after 2:00pm, which is when you can begin park hopping.

Airport Transportation options
Bus - Mears Connect and Sunshine Flyer are the most popular options — we went with Sunshine Flyer and had no issues.
Rental Car - All of the big rental car companies have locations in the Orlando airport.
Rideshare - If you’re comfortable with ridesharing and/or kids’ car seats aren’t an issue, you can use Uber or Lyft.
Minnie Vans - this service is coming back to Disney, via Lyft (and a much higher price), in summer 2022.
Transportation options within Walt Disney World
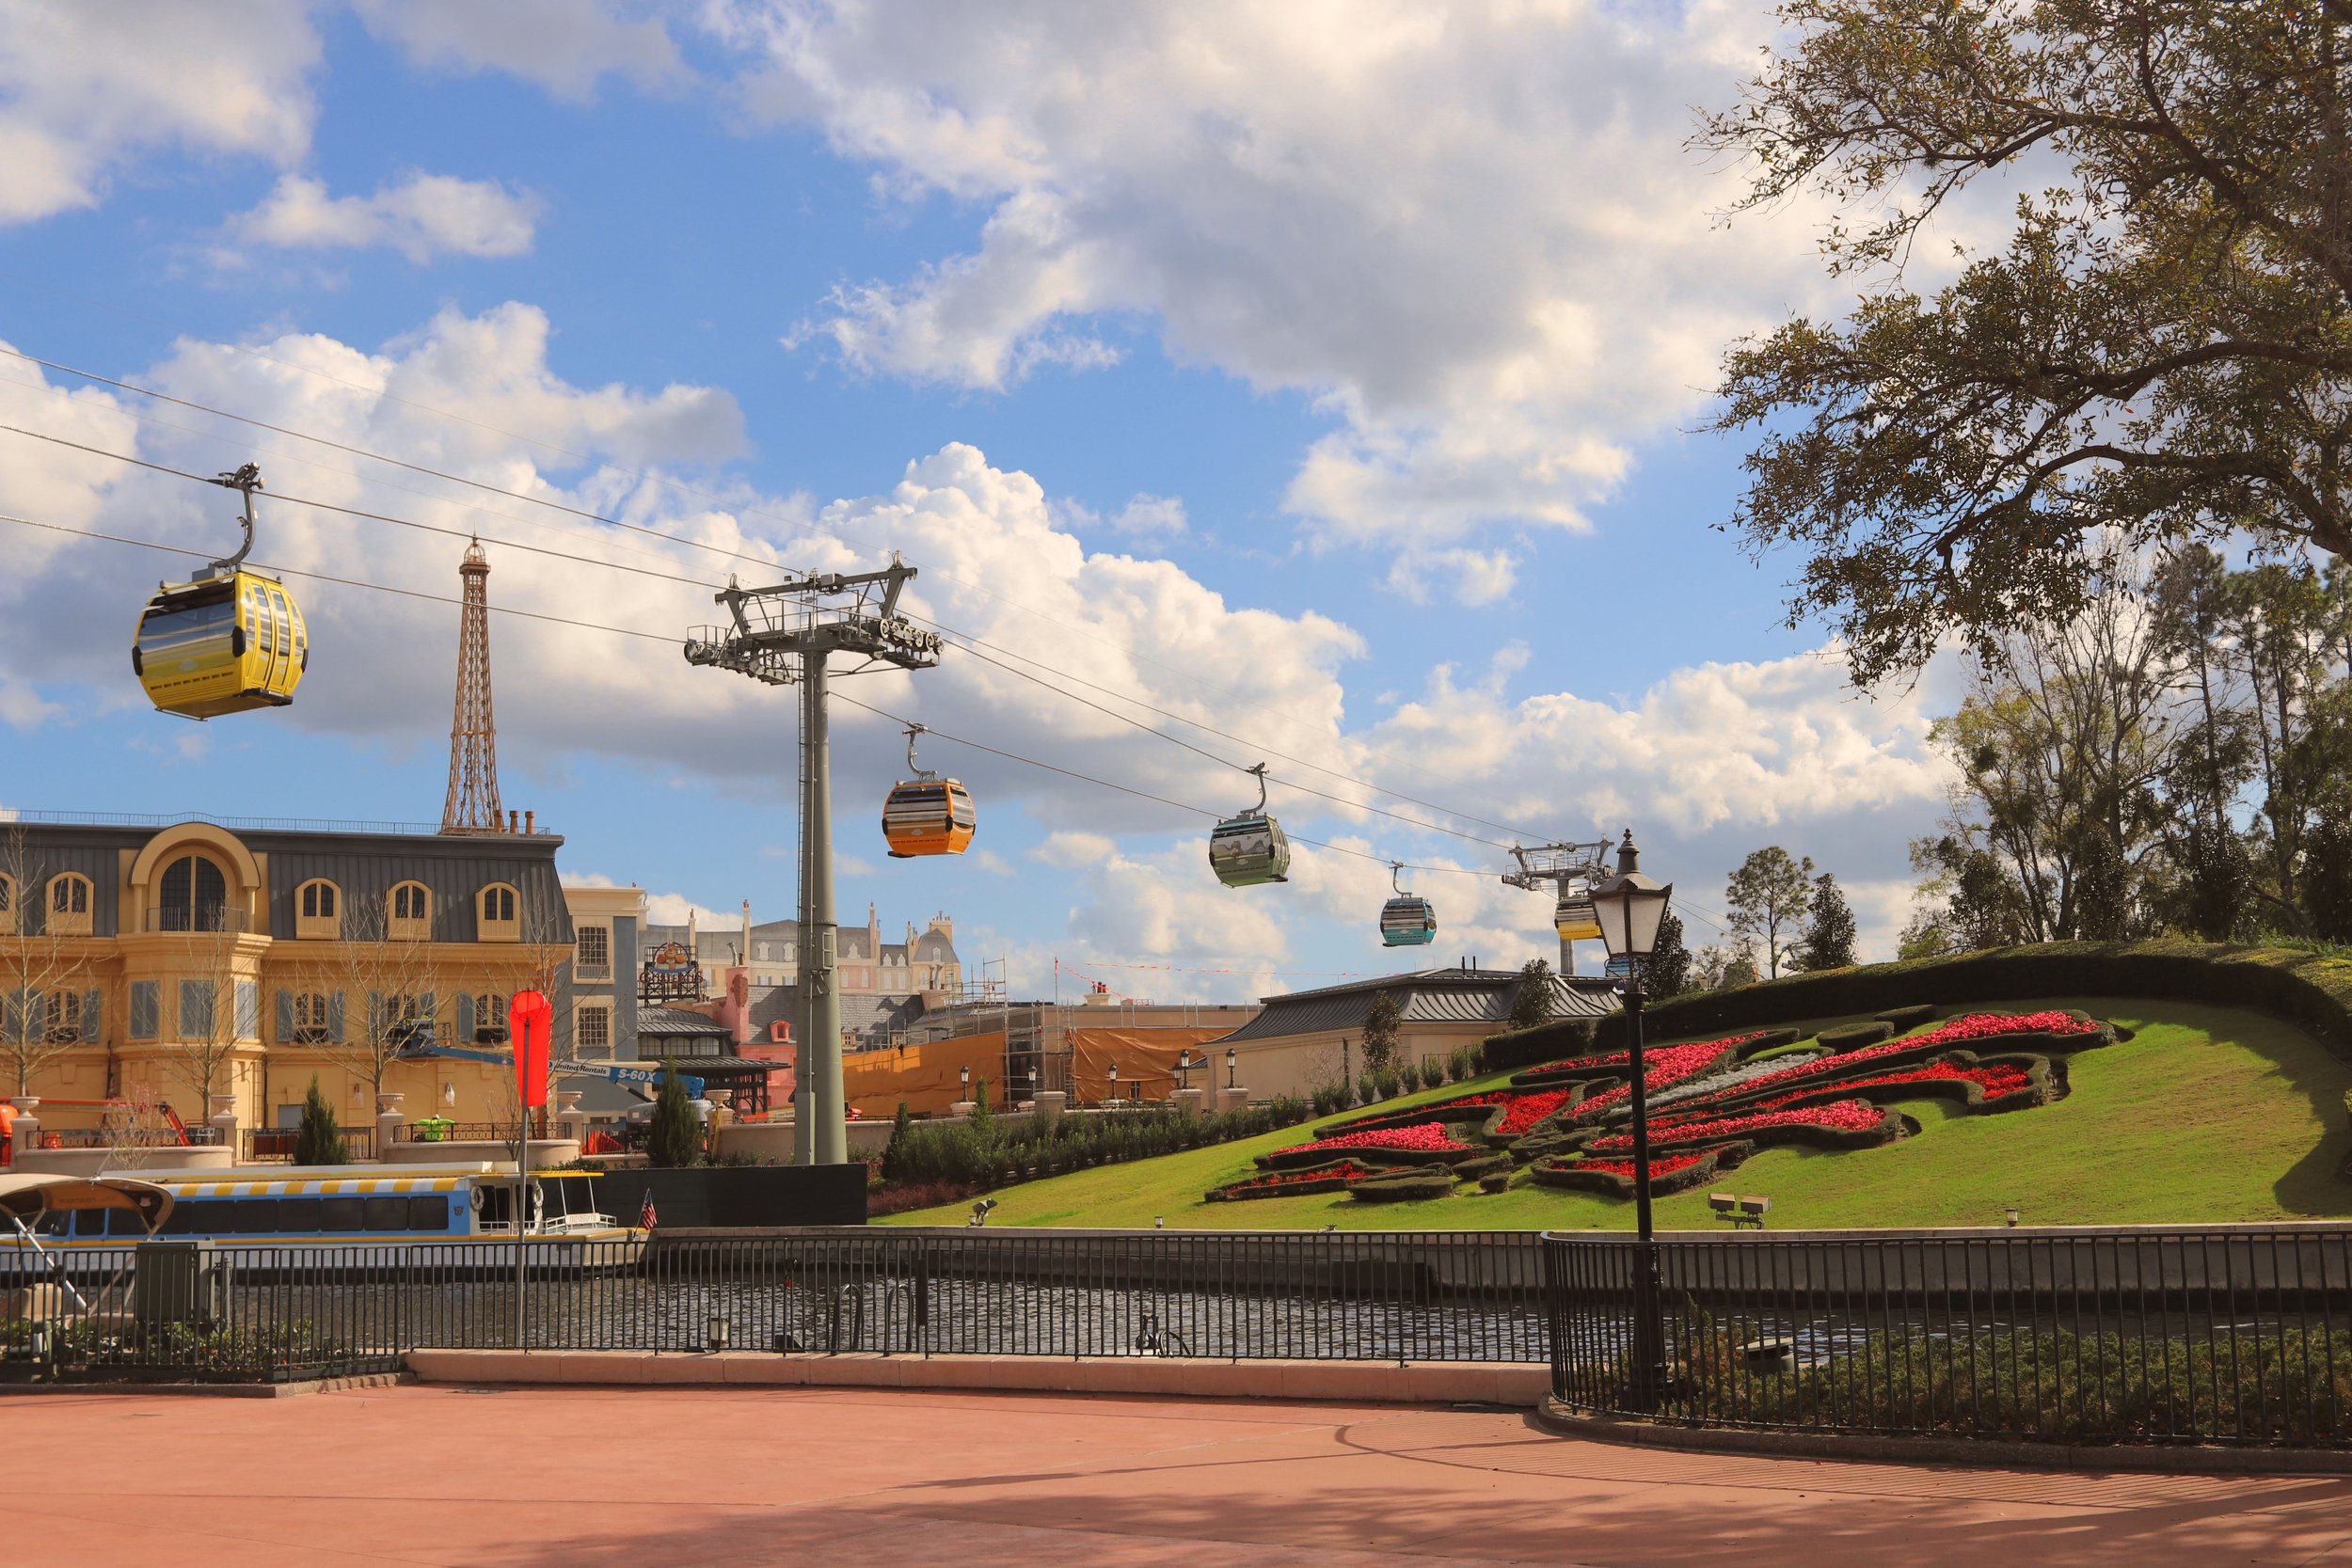
Transportation within Walt Disney World will largely depend on where you’re staying (and where you’re headed). We stayed at Caribbean Beach in their Aruba section, which was very convenient to both the Skyliner at the Riviera resort and a bus stop. We took the Skyliner to Hollywood Studios and Epcot, and the bus to Magic Kingdom and Animal Kingdom.
The Skyliner was honestly one of the most fun (and quick/convenient) parts of our trip, so if we ever have another opportunity to do Disney, we will prioritize staying at a resort that is convenient to the Skyliner!

Stroller, scooter, and wheelchair rental companies

My daughter is 6 and has refused a stroller for years… but she (and we) LOVED having a stroller at Disney. There is a lot of walking involved, so having a stroller was an incredible help when her little legs couldn’t keep up with the rest of us, or when she was capital-D Done for the day but we still needed to navigate back to our hotel room. We reserved a City Mini from Kingdom Strollers that we picked up/returned right at the Orlando airport; some services will also deliver directly to your resort/hotel. You can also rent strollers as needed inside the parks, but there are no supply guarantees and they are not the collapsible, comfy strollers your kid(s) may be used to.
There are also scooter and wheelchair rentals available if anyone in your party needs assistance.
Below are the recommendations I came across most often.
Popular disney Acronyms
Many of the terms related to these acronyms are outlined above, but here are some of the most commonly used acronyms in one place if you’re trying to make sense of all the lingo in the Facebook groups :)
AK - Animal Kingdom
BOG - Be Our Guest, a restaurant in Magic Kingdom
DAS - Disability Access Service
HS - Hollywood Studios
ILL - Individual Lightning Lane
LL - Lightning Lane
MDE - My Disney Experience
MK - Magic Kingdom
PH - Park Hopper
ROR - Rise of the Resistance, a Star Wars ride at Hollywood Studios
WDW - Walt Disney World
dining tips
There are a few different ways to dine in Disney (some of these tips are replicated from above):
Dining Plan - There are currently no dining plans at Walt Disney World as of March 2022, but you can check here to see if they will be available for your trip.
Dining Reservation - You need to book these far in advance at Disney World. You will be able to book sit-down dining reservations 60 days prior to the start of your trip, and reservations for the popular places go fast. Our travel agent, Sue, notified us when we were able to make reservations and even booked our top choices for us. If fine dining is really important to you, you will want to do more research here and have a game plan in advance of the 60-day mark! Also keep in mind that any dining reservations you decide not to keep need to be canceled 24+ hours before the reservation or you risk being charged. (Or, find a blue Guest Services umbrella in any of the parks and they will cancel it for you, and in most instances you won’t be charged a fee even if you’re within the 24-hour window.)
Quick Service - if you’re looking for something to eat while you’re in a Disney park, there are lots of Quick Service (QS) options — meaning cafeteria- and/or counter-style eateries. The best way to order food via a QS dining option is, hands-down, through the My Disney Experience (MDE) app. You can pre-order, choose a window of time for when you’d like to pick up your meal, and tell the app when you’re at (or near) the QS location within that window so they will begin preparing your order. You will then receive a notification, often within 10 minutes, when your food is ready and at what counter to pick it up. There are some menus that are better than others, and often it’s hard to find anything healthy, so I recommend having an overview of the QS options you’re interested in at each park so you’re prepared to place an order before everyone gets hangry.
In addition to the restaurants and quick service locations, there are plenty of coffee, ice cream, specialty, and beverage stands throughout the parks, especially Epcot, which is known for its around-the-world food options.
You can also bring snacks and drinks to the parks — so, if you’re trying to save money and don’t mind bringing your own snacks and meals, go for it! I packed some dry snacks in a suitcase, including granola bars, Cheerios, cheese crackers, fruit snacks, etc. so we could have a light breakfast in the room each day, grab a few snacks to bring to the parks, and fill in with Quick Service meals and treats throughout the day. (Many a Mickey ice cream bar was had.)

packing tips
You can find Disney packing lists galore online and they will all vary based on your family, your specific trip, the ages of any kids in your group, etc. So, rather than share a full packing list, here are a few tips for items I may not have normally thought to bring with me.

Pack layers, no matter what time of year you are visiting. We were there in mid-March and experienced days that were 85 degrees and other days that were 45 degrees. Obviously you probably won’t need a winter coat in June… but always pack a sweatshirt, just in case.
Bring several pairs of shoes. I brought three pairs of sneakers and rotated through them all — both to help prevent blisters, and because one pair got soaked in a downpour and took two days to dry out!
Pack disposable ponchos in your bag each day. Even if you don’t encounter rain, you will get wet on some rides and you don’t want to walk around in soggy clothes all day! I bought a 20-pack on Amazon and they came in very handy when we encountered two raging downpours in the first three days.
Bring a portable phone charger. They sell them in the parks at $30 a pop, but you can get one much cheaper in advance to bring on your trip. (Just remember to charge it up and bring a cord to connect it to your phone on-the-go if needed.)
Pack empty water bottles for each person in your group, which you can bring to the parks each day and refill at any water refill station or Quick Service location.
Pack a few trash bags, so any wet or dirty clothes can be easily separated from other items for your trip home.
Pack chewing gum in your carry-on — many airports no longer sell chewing gum, and my kids could have used it on our flights to help pop their ears!
miscellaneous planning tips
Make sure you have reserved park tickets for each day in advance! You can no longer walk up to buy park passes the day of your visit. This is where having an in-the-know travel agent comes in very handy so you aren’t stuck in a bind once you arrive.
If you’d like to pick up more tips, join some general Disney planning Facebook groups. Much of my knowledge was gleaned from Facebook groups and blog posts that others shared.
Once you book your trip, search around for the Facebook groups that are more specifically relevant to your group and your plans, including your resort. I joined a group specific to Caribbean Beach Resort, where we stayed, which was helpful; a friend who has a family member with a disability found a helpful Disney with Disabilities group.
As I found Facebook group posts that had tips I wanted to remember, I saved them in a “travel” category, and looked over them as our trip approached to refresh my memory.
I know I’ve said it before, but I’ll say it again: work with a travel agent ;)
more Tips for when you’re in Disney

Pick up a paper map as you enter each new park. They’re much easier to navigate than maps on your phone, and you’ll save your phone battery!
If you’re having trouble with the MDE app, need to change one of your park reservations from one park to another, or need to cancel a dining reservation, find one of the blue Guest Services umbrellas located throughout the parks. We decided to cancel one of our dining reservations the day of, and canceling it through Guest Services helped us avoid being charged for a “late” cancellation. They also helped us painlessly switch one of our park days from Hollywood Studios to Magic Kingdom.
Have a general idea of what rides you’d like to go on and where they are in each park, so you’re not constantly going back and forth. Explore rides by park here. (You can select different parks, narrow down by type of attraction, and add more filters as desired.)
You don’t need to dress your family in matching t-shirts if you don’t want to ;)
It sounds stressful, but the trip can truly be incredibly fun once you’re there. Some of us need to prepare to feel in control of a situation, but being prepared also makes it a lot easier to sit back, relax, and have a blast once you’re there.
Accept that you probably won’t get to do everything you want to do (because there is so very much to do!) and that’s okay. Try to go with the flow even if you can’t ride that ride you were looking forward to, your kid has Had Enough and refuses to go to the sit-down restaurant you have a reservation for, or if extreme weather throws your plans for a loop. The thing about Disney is that there is delight and magic around pretty much every corner, but you have to look around (and look up from your phone) to let it find you :) It’s called the most Magical Place on Earth for a reason.
I hope these definitely-not-expert-but-fellow-overwhelmed-beginner tips are helpful for your Disney World travel planning!
• • •